We have upgrade our image hosting to make it fun, fast and easy to post pictures in your reports. You can upload multiple pictures but the maximum size can't be greater then 1000 DPI. If it is we have software download that will allow you to resize pictures to any size automatically.
Local Download of Image Resizing Tool
You can create albums for different types of species, by rivers, lakes or streams or just one album for everything. Each album created has a slide show function built in so you can e-mail slide shows to you friends or family.
If you use SBC Global as your service provider your browser will not allow you to view the properties of the picture and copy the URL, use a non-SBC browser

Login is straightforward; just remember passwords are case sensitive.

My profile
Will show your information, show how much space you have used and have left and allows you to change your password. Note: after making any changes you will want to click on tha apply modifications button.
Create / order my albums
Click on this and it will take you to your album manager. If you do nothing here you will simply upload all your pictures to 1 generic gallery. But to create one or multiple albums you will click on New and rename "new album" to the name you will want to call your album in the bar below the box. Then click on apply modifications. Done... you now have an album, you can repeat this process to create other albums to create specailized galleries.
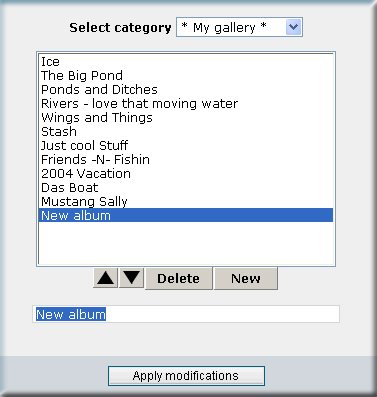
Modify my album
Minimal usage except to give a description of that album or to limit who can view that album. Use the drop arrow to view your options, this is where you can modify a album to be view by only you.
Uploading pictures
First!!! The new album accepts JPEG,jpg,gif and bmp formats and the image hosting software resizes your images automatically at upload.
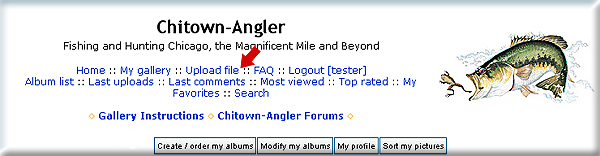
Locate upload file in the nav bar.
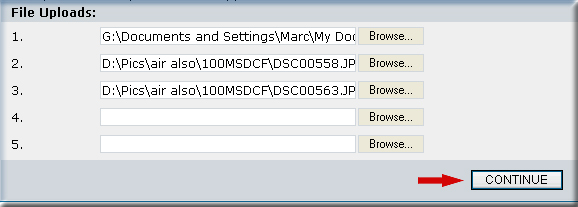
Click the browse button to locate the picture on your computer.
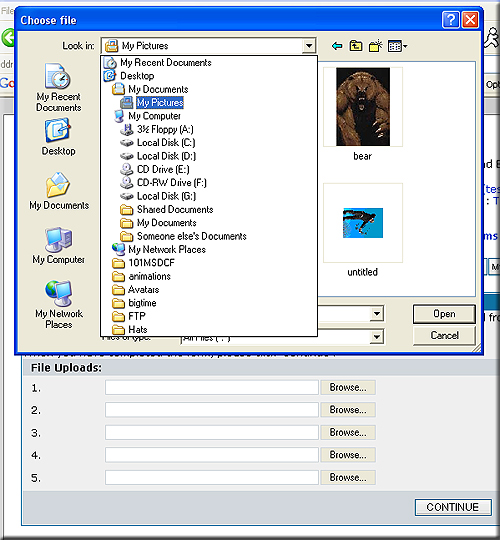
Either double click the picture/file or click it once and then open, you can browse and upload 5 pictures/files during the upload process.
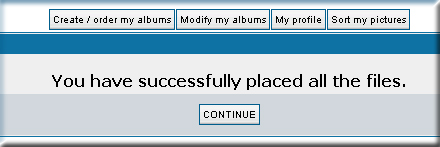
Once you have select the pictures for upload you are ready to place the image(s) in albums, hit continue.
You'll get a screen telling you that life is good and your pictures have been resized and ready to go.
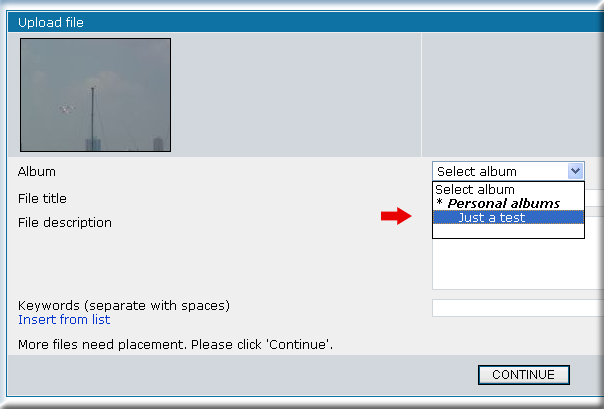
If you like add title or description upload file, select the album you want the picture to be placed into hit continue and you are done (or repeat for each image if you upload more then one).
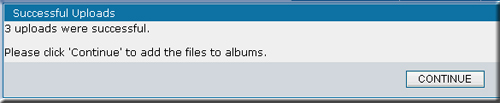
When all the images are uploaded you'll be told that it was a success and take you to your albums.
Posting pictures
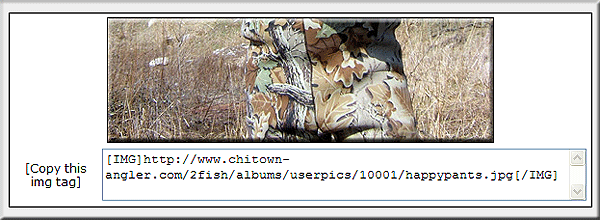
You have two choices on the method you use to post pictures; the first is the easiest and fastest. You need to be logged into the image hosting to use this first choice. Click on the thumbnail of the image you want to post so that the large image opens. Look below the image and you'll find the URL with the image tags all set up for you. Simply copy and past that text into your post, you don't need to add any tags since the image hosting does it for you. The image below displays the tag under the image, if you don't see the image tag you're not logged into your image hosting account.
When writing a post, pull up your gallery and the picture you want to post. Do a right mouse click over the picture you want and choose properties out of the box that popped up. (***see example #1 below).
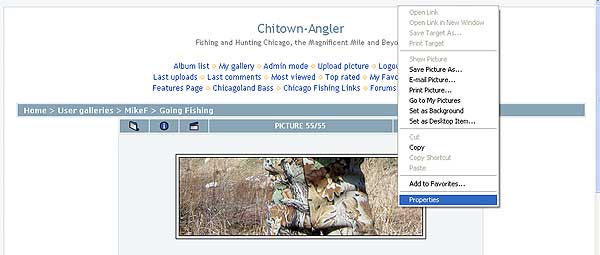
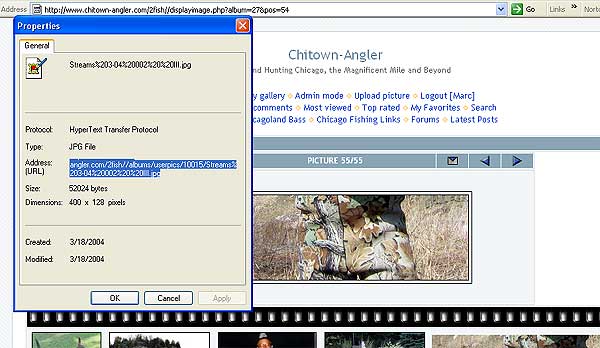
From the properties box highlight the address/URL *make sure you get it all, if it is a long URL part of it may be hidden. Start at the left top of the address, at http....,and drag down to the right as far as possible to get it all(***see example #2).


If you look at the image you will see a little box in the upper right hand side, it has a red arrow pointing to it, that is the button that will add the image tags. If you look at your image address nw you will see [img] at the beginning and [/img] at the end. Your picture should end up in your post now and instead of hitting the submit buttom when you finish your post try the preview button, if everything looks OK hit submit.
If you used these directions and find that we have missed something please let un know by e-mailing us to let us know what needs to be adjusted. Thanks, and we hope you enjoy your image hosting.
 |